|
|
Post by jes on Nov 12, 2015 13:59:06 GMT -5
Now that the new lease is open, everyone who rides a 4-stroke dirt bike (or quad) over 110cc is required to have the header pipe wrapped on their respective vehicle(s). I've had great success with my header pipe wrap and thought I'd share what I did (and what I used) that has worked so well for me.
For the header wrap I used the following: DEI 1" Titanium Exhaust / Header Wrap.
I used the 1" wrap because it is easier to wind the wrap tighter (especially around the curves of your pipe, but the 2" wrap also works well).
It is easier to install the header wrap if you remove the head pipe from your bike (although not required). Once the pipe is removed, start your wrap near the kick starter and then continue wrapping it going towards the engine. Doing it this way prevents pockets from occurring that will trap dirt and debris and/or get snagged.
Once the wrap is complete, you'll need to secure it in place. This can be accomplished with either hose clamps, or with 8" Stainless Steel Locking Ties.
The hose clamps are easier to install, but I personally like the cleaner look of the Stainless Steel Locking Ties. If you decide to use the 8" Stainless Steel Locking Ties, make sure you purchase the 1/4-Inch Drive Tension Tool for Stainless Steel Ties.
After your header wrap is on and secured to your head pipe, I strongly recommend that you spray it with Design Engineering Hi-Temp Silicone Coating Spray.
The High Temperature Silicone Coating provides lasting protection and is rated up to 1500 degrees. DEI recommends the use of this coating with their exhaust wrap because it seals the material and provides lasting protection from oil, dirt and road grime. Thoroughly spray your newly applied header wrap with the DEI spray and allow it to dry before putting your header pipe back on your bike. Once your header pipe is reinstalled you'll need to start your bike and allow it to warm up. This will cure the DEI spray and make the header wrap hard and more durable. (Note: during the DEI spray curing process it will smoke quite a bit. This will cease after a few minutes)
Finally, I also used a Moose Racing 4-stroke Pipe Armor header pipe guard to help protect my header wrap (and the header pipe) even more. Moose racing has two different models, so make sure you order the correct part for your bike.
I have ridden the new lease five different times now with my header wrap set up and it still looks great. Even with all of the Palmetto bushes constantly scraping at my header pipe, the header wrap is still holding up extremely well and it looks no worse for the wear.
Good luck and I hope to see you out riding at the new lease. 
|
|
|
|
Post by patrickfloyd on Nov 18, 2015 21:01:58 GMT -5
Thanks so much for posting this. Hunting season so I haven't had a chance to even think about this. But I need to get it done. Any chance you can post a couple pictures I can take a look at?
Pat
|
|
|
|
Post by jes on Nov 19, 2015 0:51:39 GMT -5
It was my pleasure posting it and I hope that it helps you and many others. As requested, here's a close-up of the header pipe wrapped and with the Moose Racing guard installed:  I started the header wrap just in front of the kick starter. I had previously removed the factory heat shield and continued wrapping the header wrap forward towards the engine and stopped the wrap about 1" from the end of the header pipe (where it bolts onto the engine). As I mentioned in my original post, I secured the wrap with the 8" Stainless Steel Locking Ties. I then sprayed the pipe and wrap with the High Temperature Silicone Coating and reinstalled the factory heat shield (and then sprayed it as well). After allowing everything to dry, I reinstalled the wrapped header pipe and started the engine to allow the spray to cure. My wrap has been on my header pipe since September 10th and it still looks and works great. |
|
|
|
Post by jes on Nov 19, 2015 15:33:01 GMT -5
Here's a couple more photos (split between two posts): 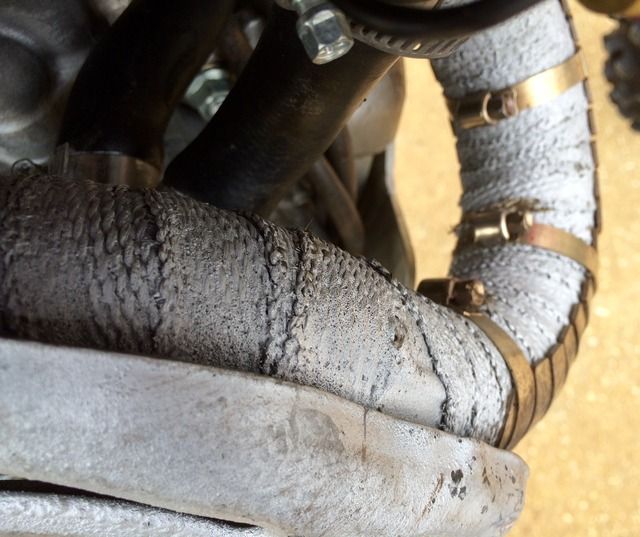 |
|
|
|
Post by jes on Nov 19, 2015 15:36:06 GMT -5
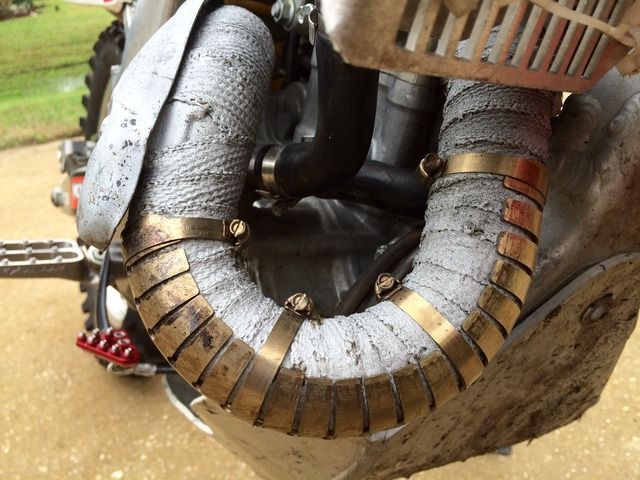 The Moose Racing Guard isn't rusting, the coloring is a combination of heat, pine sap, and the reflection of Honda Red from the shrouds and front fender. |
|
|
|
Post by jes on Nov 22, 2015 19:38:58 GMT -5
I decided to replace the hose clamps on the Moose Racing Guard with the 8" Stainless Steel Locking Ties. Afterwards I sprayed the guard and ties with the High Temperature Silicone Coating. Once the spray has cured it's very durable and fairly scratch resistant. I think it came out really well and now has a much cleaner look: 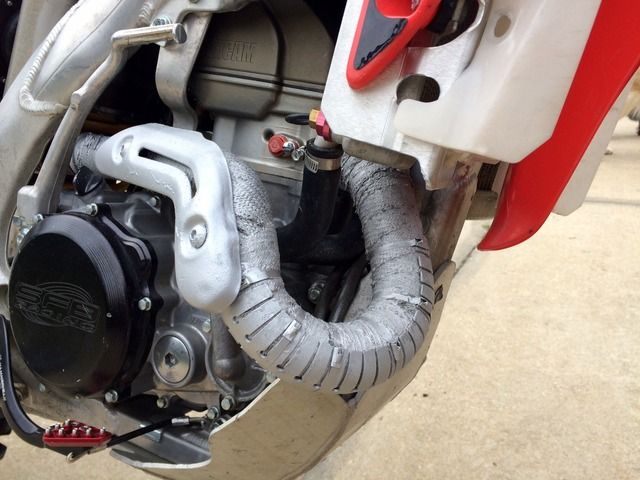 One final (and very important) note, don't ever directly pressure wash your header wrap or you'll tear it up and will need to replace it prematurely.  |
|
|
|
Post by jes on Nov 24, 2015 21:07:22 GMT -5
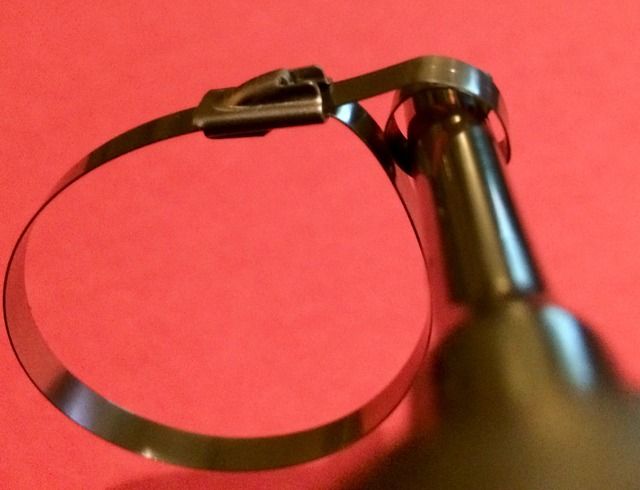
One more note, if you decide to use the 8" Stainless Steel Locking Ties for your header wrap installation you'll need to know how to properly use them. They will come in the package looking like this. You'll need to pull the end of the tie out of the locking clasp that it's tucked into in order to straighten it out. 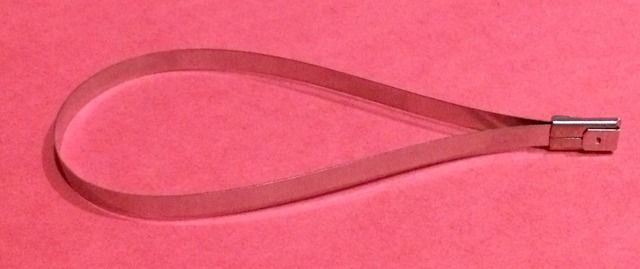 Next, you'll need to place the 8" Stainless Steel Locking Tie around your header pipe and place the end of the tie into the locking clasp (like you would with a plastic zip tie). Then you'll place the tip of the 8" Stainless Steel Locking Tie into the end of the 1/4-inch drive Tension Tool and start to tighten, winding it clockwise as shown. (Caution: If you tighten it counter-clockwise it will simply pull the locking clasp apart and ruin your tie.)
 Finally, continue to tighten it as shown until the coiled end snaps cleanly off from the stainless steel tie. Your tie will be securely fastened and holding your header wrap and/or guard firmly in place. 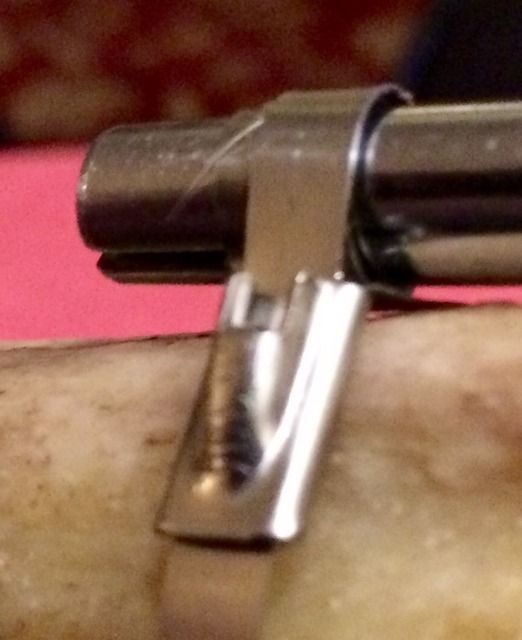 |
|
|
|
Post by bmiller on Nov 25, 2015 20:58:05 GMT -5
Great info Joe, Thanks
|
|
|
|
Post by jes on May 18, 2016 15:15:17 GMT -5
I wanted to add an update to installing the stainless steel ties (after doing this a couple more times and on my extremely hard to wrap FMF Mega Bomb header).
Instead of trying to get the ties to snap off cleanly (which tends to be hit or miss and frankly wastes too many ties), simply tighten them with the tool and then use wire cutters or snips to cut off the coiled end. Once you've cut off the excess, take needle nose pliers and bend the small end remaining on the tie back under itself and push it down in place.
Finally, here's a picture of my FMF Mega Bomb header (which replaced my stock header) wrapped as described in my post. Of note is that it survived the Anchor 3 HS when I helped sweep the course 3 different times with Glenn, Aki, and Cameron.

|
|


